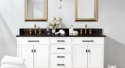
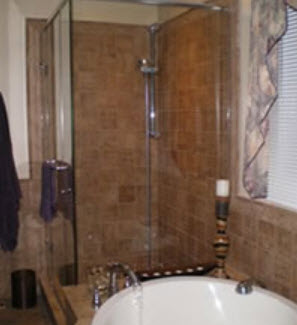
The majority of homeowners prefer the natural beauty of stone and tile over the pre-shaped plastic tub surrounds. This is true, especially for a luxury bathroom design.
After the master bath was remodeled, we chose to go with a Schluter shower system for this project.
Many bathroom remodeling contractors appreciate the ease of installation that Schluter shower systems offer. Homeowners are happy because they facilitate the installation of a tile or stone shower that is maintenance-free, sanitary, and impervious to water.
Basic Steps for Installing a Schluter Shower System for a Tile Shower
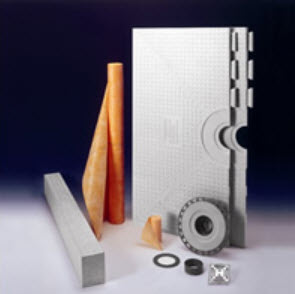
Photo courtesy of Schluter Systems
After the bathroom contractors had gutted the old bathroom and roughed in the tub and shower areas the Schluter drain pan could be installed.
- Unmodified thin-set mortar was spread onto the shower substrate floor. Next, the Schluter-KERDI SHOWER TRAY (Schluter-KERDI-SHOWER-ST) was laid and pressed into place in the bed of a thin-set.
- Next Schluter-KERDI-BAND Waterproofing strip was affixed, using thin-set mortar, to every seam where the wall met the floor and where the wall met the wall to secure a proper seal.
- Following that, the walls were covered Schluter-KERDI Waterproofing membrane. To do this the walls were troweled with thin-set. Then the thin layer of waterproofing material was unrolled over the prepped walls. The edge of each new piece of waterproofing membrane overlapped the previous piece by two inches. This sealed all the walls in the shower area so that they would be protected from moisture and vapor infiltration.
*Note: Schluter-KERDI can be used directly over regular drywall. When installed properly the waterproof membrane will completely protect a tiled shower wall from moisture and water.
- The Schluter-KERDI-DRAIN was installed and the waste line was connected. This Schluter floor drain has a sloped, integrated bonding flange. The entire shower tray then had a layer of unmodified thin-set mortar applied to its surface. The shower floor was then covered with the Schluter-KERDI Waterproofing membrane.
- Then, the Schluter-KERDI SHOWER CURB (Schluter-KERDI-SHOWER-SC) was cut to the proper length and installed. This curb provides a ledge that will keep water in the shower and will support the glass door.
- The KERDI shower curb then had the waterproofing membrane applied to it with a thin-set. Careful attention was given to sealing all of the junctions where the curb met the wall and floor.
*Note: Schluter-KERDI-SHOWER curb is made from EPS (expanded polystyrene) foam. It has 57 psi of compressive strength and can support tile and glass shower doors.
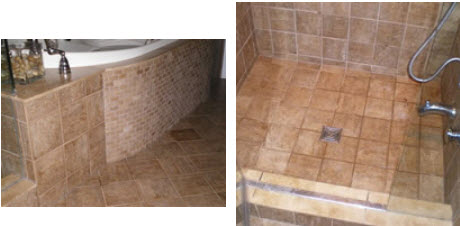
- The shower stall was then tiled and grouted as usual.
- Finally, the glass walls and door were installed for the shower. **
** Please Note: These basic steps are only meant to provide a general outline for using a Schluter shower system. Bathroom remodelers, contractors, and homeowners who choose to use this product for their bathroom shower makeover or new installation should follow the specific directions provided by the manufacturer.
Schluter Shower Elements Used
- Schluter-KERDI SHOWER TRAY (Schluter-KERDI-SHOWER-ST) - prefabricated tray
- Schluter-KERDI SHOWER CURB (Schluter-KERDI-SHOWER-SC) prefabricated curb
- Schluter-KERDI-DRAIN - floor drain with a sloped, integrated bonding flange
- Schluter-KERDI-BAND Waterproofing strip - for seams
- Schluter-KERDI Waterproofing membrane - for walls and floors
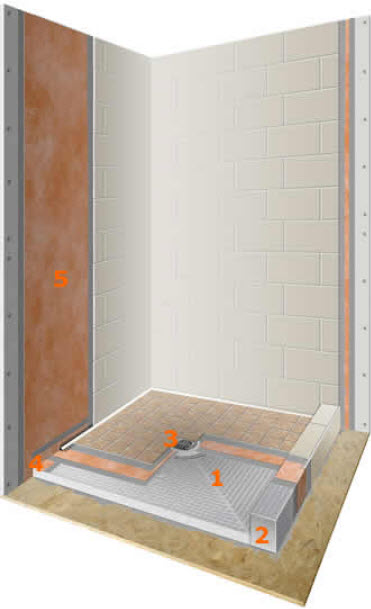
Diagram courtesy of Schluter Systems
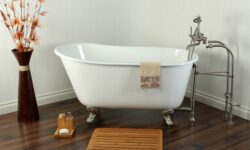
Varying the size and shape of the tile or stone used in a bathroom remodel offers rich texture and appealing visual focal points. The smaller tile that was installed at the base of the jacuzzi tub looks sensational.
We tiled the shower stall and incorporated a Schluter-KERDI Shower tray and curb under the tile.
For more information on Schluter products, used for tile and stone, please visit their website.
 (1)Dislikes
 (0)
(0)