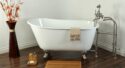
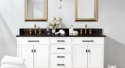
This is a good time to re-think your bathroom: you can fit the new bath in a different position and take advantage of the latest designs
Before you start
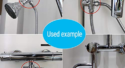
Assemble as many fittings as possible onto the new bath before you remove the old one. Not only will fitting be easier before the bath is in position, but the water will not be cut off for as long. Use flexible connectors and a flexible waste joint. If you want to put the bath in a different position, you will have to work out how to re-route the waste pipe, as well as adapting the supply pipes.
Tools
2 adjustable spanners; spirit level; damp cloth; potentially long nosed pliers; small spanner; hacksaw; screwdriver.
Materials Bath
two 25mm thick boards to support its feet; two new taps or a mixer tap (with washers); two 22mm flexible pipe connectors; 40mm waste outlet with plug and two flat plastic washers; bath trap (deep-seal if the waste pipe links to a single stack) with flexible overflow assembly; silicone sealant; PTFE tape.
1. Fit the supporting frame following the maker's instructions. It is usually done with the bath placed upside down.
2. Fit the taps or mixer and the tap joints in the same way as for a washbasin. Some deck mixers come with a plastic gasket to fit between the deck and the bath. On a plastic bath, fit a reinforcing plate under the taps to prevent strain on the bath deck.
3. Fit the waste outlet.
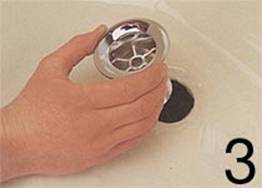 This may be a tailed grid fitted in the same way as for a sink. Or it may be a flanged grid only, fitted over the outlet hole (with washers on each side of the bath surface) and fixed with a screw to a tail formed at one end of the flexible overflow pipe.
4. Fit the top end of the overflow pipe into the back of the overflow hole and screw the overflow outlet, backed by a washer, in position.
5. Slot the banjo overflow, if supplied, onto the threaded waste outlet and fit the bottom washer and back nut.
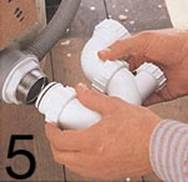 Attach the trap, then fit the bath into position with a flat board under each pair of feet in order to spread the load.
6. Place a spirit level on each of the four sides of the bath to check that it is horizontal.
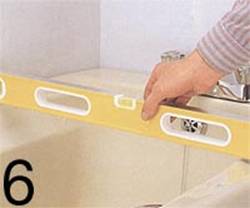
If necessary, adjust the legs until the bath is perfectly level. Then tighten the locking nuts on the adjustable legs.
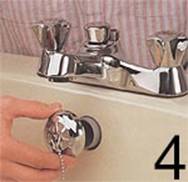
7. Fit the flexible connector on the farthest tap to its supply pipe, making a compression joint. If the supply pipe is too high, cut it back to a convenient length, leaving it too long rather than too short, as the connector can be bent slightly to fit.
8. Connect the second tap tail in the same way as the first. Then connect the trap outlet to the waste pipe (normally a push-fit joint). Restore the water supply and check the joints for leaks. Tighten if necessary, but not too much.
9. Fix the bath panels according to the maker's instructions. They may screw or clip to a wooden frame, or be fixed to a batten screwed to the floor. Fill the bath with water before sealing the joints between the bath sides and walls with silicone sealant. This ensures that the bath will not settle in use and pull the sealant away.
Helpful Tips
If, on a mixer, the hot and cold indicators are on different sides from the appropriate supply pipes, reverse the discs on the tops of the taps, if possible. Alternatively, cross the flexible pipe connectors to join the taps to the correct pipes.
 (1)Dislikes
 (0)
(0)