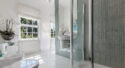
Major bath renovation is best done by professional firms. They take a day or two and will repair baths cracks or chips and apply a new coating, available in a range of colors. You can do smaller bath repair jobs yourself, using a DIY kit.
Repairing bath enamel
Before you start remove every trace of grease or flaky enamel from the surface of most baths. Once cleaned, do not touch the surface again with your fingers.
- Fill small bath surface chips with an epoxy resin filler (such as car-body filler) or use one of the proprietary bath repair kits available on the market.
- Rub the surface smooth with fine abrasive paper, then coat the repaired area with two coats of matching bath enamel, following the instructions on the pack. Touch-up sticks are available in a variety of colours to cover small repairs.
Repairing a plastic bath
Burns on a baths acrylic surface cannot be repaired. However, chips can be filled with a special acrylic repair paste available as a kit. You can polish out scratches with metal-polish wadding because the colour goes right through the material. However, glass-reinforced plastic (GRP) can be damaged by abrasive cleaners as only the top layer of material is coloured.
Changing bath taps
Because of the cramped space at the end of a bath, fitting new taps to an existing bath can be difficult. It is often easier to disconnect and pull out the bath so that you have room to apply enough force to undo the backnuts of the old taps. The alternative to disrupting the bathroom is to fit new tap headgear only, using a tap conversion kit.
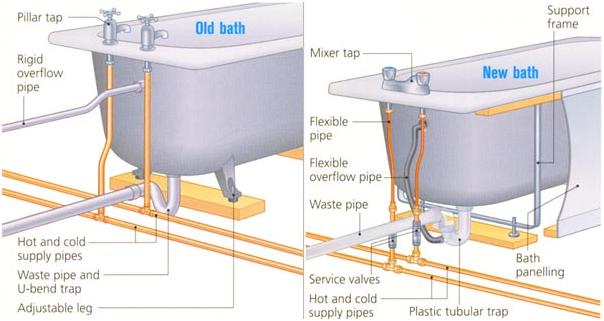
Connections to an old bath and new bath: As when replacing a wash basin or bidet, add a service valve on each of the supply pipes before connecting them to the new taps. This allows them to be isolated easily for future maintenance.
 (1)Dislikes
 (0)
(0)